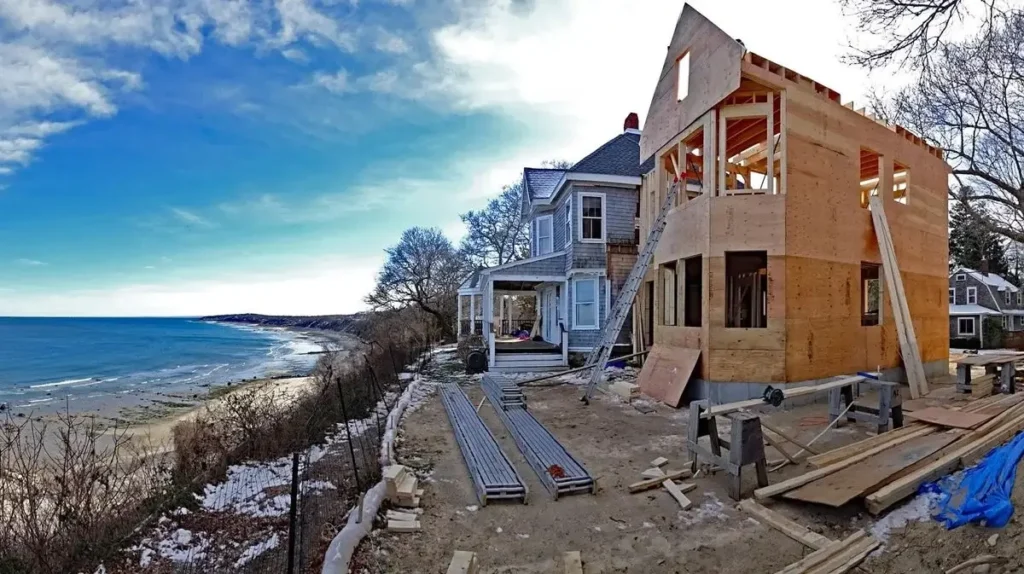
When it comes to renovating your home with board and batten siding, precision is key.
A board and batten calculator can be an invaluable tool, helping you to accurately estimate the materials needed for your renovation project.
- Key Takeaways
- Measuring Your Space
- Accounting for Openings
- Determining the Number of Boards
- Incorporating Extra Allowance
- Assessing Different Styles
- Considering Weather Resistance
- Visualizing with Virtual Tools
- Calculating Material Needs
- Choosing the Right Batten Material
- Spacing and Fixing Battens
- Ensuring Durability and Stability
- Preparing the Installation Site
- Tools and Equipment Checklist
- Step-by-Step Installation Guide
- Benefits of Sustainable Materials
- Selecting Eco-Friendly Cladding
- Impact on Long-Term Maintenance
Key Takeaways
- A board and batten calculator simplifies the estimation of materials by considering the dimensions of your space and accounting for any openings such as windows and doors.
- Selecting the appropriate PVC cladding involves assessing different styles, considering weather resistance, and using virtual tools to visualize the result.
- Battens are a crucial component of cladding, with the right material, spacing, and fixing methods ensuring durability and a flawless finish.
- Proper installation of board and batten siding requires preparation, a comprehensive checklist of tools and equipment, and following a detailed step-by-step guide.
- For the environmentally conscious builder, choosing eco-friendly materials can offer benefits in sustainability and reduce long-term maintenance costs.
Understanding Board and Batten Calculations

Measuring Your Space
Before you can use a board and batten calculator for your renovation project, accurately measuring your space is crucial. Ensure you have the right tools on hand, such as a tape measure (preferably 5m – 8m), a long ruler or straight edge, a hammer, a spirit level, and a basic staple gun.
When measuring, consider the shape of your room. For standard rectangular spaces, calculating the area is straightforward. However, if your room includes sloped walls, measure the height only to the base of the triangular space under the slope, not to the ceiling peak.
For rooms with unique shapes, you may need to calculate the area of each wall individually. For example, the area of a triangular space is found using the formula: area = height \ imes base / 2.
Remember to account for doors and windows by subtracting their total area from the overall wall space. You can use default dimensions or input custom sizes into the calculator to get accurate material estimates.
Here’s a quick checklist for measuring your space:
- Measure the length and height of each wall.
- Calculate the area of any non-standard wall shapes.
- Subtract the area of doors and windows.
- Use the calculator to adjust for any unique room features.
Accounting for Openings
When planning for board and batten installation, it’s crucial to account for openings such as doors and windows. These openings will affect the total amount of material needed and must be subtracted from the overall wall area. To ensure accuracy, measure the height and width of each opening and calculate the total area they occupy.
Remember to measure each opening accurately and note down the dimensions. This will prevent overestimating the material required and avoid unnecessary costs.
Here’s a simple way to account for openings in your calculations:
- Measure the height and width of each door and window.
- Multiply the height by the width to find the area of each opening.
- Sum up the areas of all openings to find the total area to deduct.
| Opening Type | Height (ft) | Width (ft) | Area (sq ft) |
|---|---|---|---|
| Door | 6.8 | 3 | 20.4 |
| Window | 4 | 3 | 12 |
After determining the total area of the openings, subtract it from the gross room area to get the net room area, which is the actual surface you will cover with board and batten.
Determining the Number of Boards
To accurately determine the number of boards required for your board and batten project, a systematic approach is essential. Start by measuring the height and width of each area to be clad, ensuring you convert these measurements into meters for consistency. Next, calculate the total surface area by multiplying the height by the width for each section.
Remember to subtract the area of any windows, doors, or other openings from the total surface area to avoid overestimating your material needs.
Once you have the adjusted surface area, divide this by the coverage area of a single cladding board. This will give you the total number of boards needed. It’s advisable to include an extra 10% allowance for cutting and fitting, ensuring you have enough material to complete the project without any shortages.
Here’s a quick reference table to help you estimate the number of boards:
| Measurement | Calculation | Result |
|---|---|---|
| Surface Area (m^2) | Height (m) x Width (m) | Total Area |
| Openings (m^2) | Sum of Windows, Doors, etc. | Subtract from Total Area |
| Number of Boards | Adjusted Area / Board Coverage | Total Boards + 10% Allowance |
Incorporating Extra Allowance
When planning for board and batten installation, it’s crucial to incorporate an extra allowance in your calculations. This ensures that you have enough material to account for any cutting errors or adjustments during the installation process. A general rule of thumb is to add 10% to your total material estimate to cover these contingencies.
For instance, if your calculations suggest you need 100 square feet of cladding, you should purchase 110 square feet to be safe. Here’s a simple breakdown:
- Required cladding: 100 sq ft
- Extra allowance (10%): +10 sq ft
- Total purchase: 110 sq ft
Remember, it’s better to have a little too much material than not enough. Running out mid-project can lead to delays and potentially mismatched batches of material if you have to order more.
Utilizing a Square Wall Panelling Calculator can greatly simplify this step. By entering the measurements and preferred panel numbers, the calculator can provide a more accurate estimate, including the extra allowance needed.
Selecting the Perfect PVC Cladding

Assessing Different Styles
When embarking on a renovation project, the aesthetic appeal of your exterior cladding is just as important as its functionality. Assessing different styles of board and batten is crucial to achieving the desired look and feel for your home. From the traditional charm of a Modern Farmhouse to the sleek lines of contemporary designs, the variety of styles available can cater to any taste.
- Traditional: Emphasizes classic patterns and textures reminiscent of historical architecture.
- Modern: Features clean, minimalist lines and often incorporates mixed materials.
- Rustic: Focuses on natural, rugged aesthetics, often using rough-sawn or reclaimed wood.
- Coastal: Characterized by light, airy colors and textures that reflect seaside living.
The key to a successful design is in the blend of textures and colors that complement each other, creating a cohesive and inviting exterior.
It’s essential to consider how these styles will integrate with your home’s existing features and the surrounding environment. For instance, the Shiplap boards are another type of horizontal cladding that can add a unique touch to your project. Whether you’re aiming for a vertical joint timber look or an expressive board and batten facade, the right style can significantly enhance your home’s curb appeal.
Considering Weather Resistance
When selecting PVC cladding for your renovation project, weather resistance is a critical factor to consider. Different cladding materials react uniquely to various weather conditions, and it’s essential to choose one that can withstand the climate in your area. For instance, some products come with built-in features like rain screens to ensure proper drying of the wall, which is vital for maintaining the cladding’s integrity over time.
It’s important to remember that the effectiveness of weather resistance often depends on the correct installation of weather-resistive barriers (WRBs) and flashings. Each cladding type may require specific housewrap and drainage solutions to fully protect against moisture ingress.
Here’s a quick checklist to guide you through the key considerations for weather resistance in cladding materials:
- Assess the cladding’s ability to handle your region’s weather patterns.
- Verify if the product has additional features like built-in rainscreens.
- Ensure compatibility with the necessary WRBs and flashings for your chosen cladding.
- Consider the use of a waterproof membrane or breathable barrier, depending on the structure’s needs.
- Check the manufacturer’s warranty requirements regarding weatherproofing measures.
Visualizing with Virtual Tools
In the digital age, virtual tools have revolutionized the way we plan and visualize renovations. These tools allow you to upload a photo of your space and experiment with different board and batten styles, colors, and materials in real time. This interactive approach helps in making informed decisions about the aesthetic and functional aspects of your renovation project.
With the ability to save and compare multiple projects, virtual tools offer a convenient platform to refine your vision before making any physical changes. They provide a realistic preview of the final outcome, ensuring that your choices align with your expectations.
For instance, the Virtual Remodeler tool enables users to see the transformative potential of their design choices. By uploading an image of your home, you can select from various cladding options and instantly see the impact on your home’s exterior. The tool also generates a product list for easy ordering, streamlining the renovation process from conception to completion.
Calculating Material Needs
Once you’ve measured your space and accounted for openings, it’s time to calculate the material needs for your board and batten project. Start by determining the net room area, which is the surface to be covered after subtracting the area of any openings. This will give you the total square footage that requires cladding.
To ensure you have enough material, always include an extra allowance in your calculations. A general rule of thumb is to add 10% more material to cover any waste or unexpected adjustments.
Here’s a simple breakdown of the steps to calculate your material needs:
- Measure the height and width of each area to be clad in meters.
- Calculate the total surface area by multiplying the height by the width of each section.
- Subtract the area of any windows, doors, or other openings from the total surface area.
- Divide the remaining surface area by the coverage area of each cladding board to determine the number of boards required.
Remember, the Board And Batten Calculator can simplify this process by instantly providing you with the batten spacing and number of battens needed for your project dimensions.
The Role of Battens in Cladding

Choosing the Right Batten Material
When it comes to installing board and batten cladding, selecting the right batten material is crucial for both the aesthetic and structural integrity of your project. Timber battens are often recommended for PVC cladding due to their ability to provide a secure foundation and promote proper ventilation behind the boards. This prevents moisture build-up, which can lead to potential damage over time.
The choice of wood for battens can impact the insulation and interior paneling of a space. Common wood choices include cedar, pine, oak, and redwood, each offering unique characteristics and benefits.
It’s important to consider the specific requirements of your cladding when choosing battens. For instance, the length of the screws and the spacing between battens can vary depending on the type of cladding and the desired finish. A typical installation might use 75mm screws, with two screws for each side of the batten, ensuring a secure and stable setup.
Here’s a quick reference for batten material selection:
- Cedar: Naturally resistant to rot and insects
- Pine: Cost-effective and readily available
- Oak: Durable with a distinctive grain
- Redwood: Resistant to shrinking and warping
Spacing and Fixing Battens
Proper spacing and fixing of battens are essential for a secure and visually appealing board and batten installation. Battens must be evenly spaced to ensure that each board is supported and to prevent warping or buckling over time. The standard spacing for battens is typically 16 to 24 inches on center, but this can vary depending on the specific requirements of your project and the width of the boards being used.
When securing battens, it’s important to use the correct fasteners. For PVC cladding, timber battens designed for exterior use are recommended. These should be fixed to the underlying structure with screws that are long enough to provide a strong hold but not so long that they penetrate through to the interior. A common practice is to use 75mm screws, with two screws for each side of each batten, ensuring a stable base for the cladding.
The final top fixing of the boards is then covered by a top edge trim, leaving no visible fasteners for a flawless finish.
Here is a simple checklist for fixing battens:
- Measure and mark the spacing for battens according to the project’s specifications.
- Use timber battens that are treated for exterior use to prevent moisture damage.
- Secure battens to the structure with appropriate screws, typically 75mm in length.
- Ensure that screws are fixed at each marked spacing point for uniformity.
- Cover the top fixing of the boards with a trim to conceal fasteners.
Ensuring Durability and Stability
Ensuring the durability and stability of your board and batten cladding is crucial for the longevity of the renovation project. Proper material selection and installation techniques are key to preventing warping and maintaining structural integrity. For instance, adding a 9mm plywood backing can significantly enhance stability; just ensure that wall frames are adjusted accordingly to accommodate this addition.
When considering the fixings for your cladding, opting for a secret fixing system can result in a cleaner and more stable finish. This method hides the fixings, protecting them from the elements and reducing the risk of corrosion over time.
It’s also important to incorporate diagonal bracing, especially in areas that will bear weight, such as a wall-mounted TV. Below is a list of tips to maintain the durability and stability of your cladding:
- Use a diagonal brace on door frames to prevent warping.
- Ensure all fasteners are driven straight and flush.
- Regularly check that courses are leveled during installation.
- Clear any debris from panel grooves to ensure proper nesting and alignment.
Installation Techniques for Board and Batten

Preparing the Installation Site
Before the actual installation of board and batten cladding begins, it is crucial to properly prepare the site to ensure a smooth and efficient process. Clearing the area of any debris and ensuring the ground is level forms the foundation of a successful installation. Use a tape measure to mark out the dimensions of the cladding area and employ a spirit level to verify evenness.
- Organize the materials by laying out all panels and grouping them by size.
- Estimate the required materials using the provided formulas, taking into account the area to be covered.
- Mark your starting point and level lines to guide the installation.
Attention to detail during the preparation phase can prevent complications later on. Ensuring that the site is clean, level, and well-organized sets the stage for a seamless installation of your board and batten cladding.
Tools and Equipment Checklist
Before commencing the installation of board and batten siding, it’s crucial to ensure you have all the necessary tools and equipment at hand. A comprehensive checklist will streamline the process and prevent any unnecessary interruptions.
Essential tools include:
- Tape measure (5m – 8m)
- Hammer
- Spirit level (preferably large)
- Jigsaw
- Chop saw / Mitre Saw
- Circular saw
- Drill driver
- Impact driver
- Pencil
- Set square (10″ rafter square recommended)
- Long ruler or straight edge
- Basic staple gun
Remember, investing in quality tools can significantly affect the efficiency and outcome of your installation. Opting for reliable brands and considering combo pack tools can offer better value and compatibility.
When preparing for drywalling or similar tasks, additional items such as a hand grinder, chalk line, tin snips, and a masonry chisel may be required. Always wear appropriate safety gear, including safety glasses, gloves, and ear protection, to ensure a safe working environment.
Step-by-Step Installation Guide
Following the step-by-step installation guide is crucial for a successful board and batten project. Begin by organizing all your materials and tools. Lay out the panels based on size and type, ensuring everything is accounted for before commencing work.
Proper preparation of the installation site sets the foundation for a smooth process.
Next, mark your starting point and level lines accurately. It’s often recommended to start with the furthest left vertical board and work your way to the right, ensuring each panel is level and properly seated. Install the starter strip and J-channel as needed, and then proceed to install the panels from the bottom up, one row at a time, in a shingle fashion.
Remember to refer to the physical installation manual that comes with your kit for detailed instructions and recommendations, including the order of panel installation and any specific instructions for additional features like picture shelves or dado.
Eco-Friendly Options for the Conscious Builder

Benefits of Sustainable Materials
Choosing sustainable materials for your renovation project is not just a trend; it’s a commitment to the environment and future generations. Sustainable materials can significantly reduce the ecological footprint of a construction project. By opting for eco-friendly options, builders and homeowners can enjoy a range of benefits that extend beyond the immediate scope of the renovation.
For instance, using materials like reclaimed wood or recycled composites can lead to a reduction in resource waste. These materials often require less energy to produce and can contribute to earning LEED credits, which recognize and encourage environmentally responsible building practices. Moreover, sustainable materials tend to pollute less during both their production and their lifecycle, leading to a cleaner environment.
Sustainable materials not only contribute to a healthier planet but also offer unique aesthetic qualities that can enhance the character of your renovation project.
Another advantage is the potential for lower maintenance requirements. Materials that are designed to be durable and weather-resistant may not require frequent painting, staining, or cleaning, which can save time and resources in the long run. This aspect is particularly appealing to those who prioritize ease of maintenance in their building choices.
Selecting Eco-Friendly Cladding
When embarking on a renovation project, choosing eco-friendly cladding is not just a trend but a responsibility towards the environment. Selecting materials that have a lower carbon footprint can significantly reduce the overall environmental impact of your project. Consider options like reclaimed wood, which not only offers a rustic charm but also repurposes existing materials, reducing the need for new resources.
Eco-friendly cladding comes in various styles and materials, each with its benefits:
- Reclaimed Wood: Offers a unique aesthetic and history, with the added benefit of resource conservation.
- Bamboo: A fast-growing, renewable resource that provides durability and a modern look.
- Recycled Composite: Made from recycled plastic and wood fibers, it’s a sustainable choice that resists rot and pests.
By integrating eco-friendly cladding into your renovation, you not only contribute to a more sustainable construction industry but also enjoy the long-term benefits of durable, low-maintenance materials.
It’s essential to research and compare the life cycle of different cladding materials. Some may have a higher initial cost but offer savings in maintenance and energy efficiency over time. Always aim for a balance between ecological benefits and practicality to ensure your renovation stands the test of time while respecting the planet.
Impact on Long-Term Maintenance
Choosing eco-friendly options for your renovation project not only supports the environment but also impacts the long-term maintenance of your property. Sustainable materials are often more durable and require less frequent replacement, leading to cost savings over time. For instance, materials like TruExterior have been noted for their ability to be installed in various weather conditions, potentially avoiding construction delays.
When considering the long-term maintenance of eco-friendly cladding, it’s important to factor in the potential for higher upfront costs against the reduced need for repairs and replacements. This can be seen in the context of building science, which suggests that using sustainable materials can improve the durability of your building. Moreover, a well-maintained exterior can significantly enhance a property’s first impression, which is crucial for real estate value.
By investing in eco-friendly materials, homeowners are not only contributing to a more sustainable future but are also likely to see a return on investment through increased property value and decreased maintenance costs.
As a conscious builder, you’re always looking for ways to reduce your environmental footprint. Our website offers a suite of eco-friendly construction calculators designed to help you make sustainable choices with ease. From calculating the perfect amount of tiles to ensuring your rebar size is just right, we’ve got you covered. Take the first step towards greener building practices by visiting our website today and exploring our range of calculators tailored for the eco-conscious builder.
Conclusion
In conclusion, utilizing a board and batten calculator is an invaluable step in ensuring the success of your renovation project.
By accurately determining the number of boards needed, accounting for openings, and considering the right fixings and battens, you can avoid costly mistakes and wastage. Whether you’re opting for PVC cladding, shiplap, weatherboard, or any other style, the calculator simplifies the process, allowing you to focus on achieving that perfect finish.
Remember to always factor in an extra 10% for cuts and adjustments. With the right tools and calculations at your disposal, your renovation is poised to enhance both the functionality and curb appeal of your home.
Frequently Asked Questions About Board and Batten Calculator
How do I calculate the number of boards needed for board and batten cladding?
To calculate the number of boards, measure the height and width of each area to be clad in meters, calculate the total surface area, subtract the area of any openings, divide the remaining surface area by the coverage area of each cladding board, and add 10% extra for allowance.
What should I consider when choosing PVC cladding for my renovation project?
Consider the style, finish, and texture that you desire for your project. Assess different options such as shiplap, weatherboard, or shadow gap cladding. Also, consider the weather resistance and the visual appeal using virtual tools.
How are battens used in the installation of cladding?
Battens are a vital component in cladding installation. Each board is nailed to the batten through the exposed lip or tongue, and the final top fixing is covered by a top edge trim, leaving no visible fasteners for a flawless finish.
What tools and equipment are needed for installing board and batten?
You’ll need a hammer or screw gun, circular saw, level, chalk line, tape measure, tin snips, brush, small screwdriver, masonry chisel, and a chop saw with a continuous diamond turbo blade. Don’t forget safety gear such as goggles, gloves, and ear protection.
How can I ensure my board and batten cladding is eco-friendly?
Choose sustainable materials like recycled PVC or eco-friendly timber. Look for products with a lower environmental impact and consider the long-term maintenance and durability of the materials.
What is the role of a virtual remodeler tool in selecting cladding?
A virtual remodeler tool helps visualize how different cladding options will look on your house, allowing you to experiment with shapes, colors, and sizes, and ensuring you are satisfied with the exterior appearance before making a final decision.