
When it comes to building a fence, the integrity of the structure largely depends on the proper installation of fence posts.
Understanding the nuances of fence post depth and spacing is essential for a sturdy and durable fence.
Key Takeaways
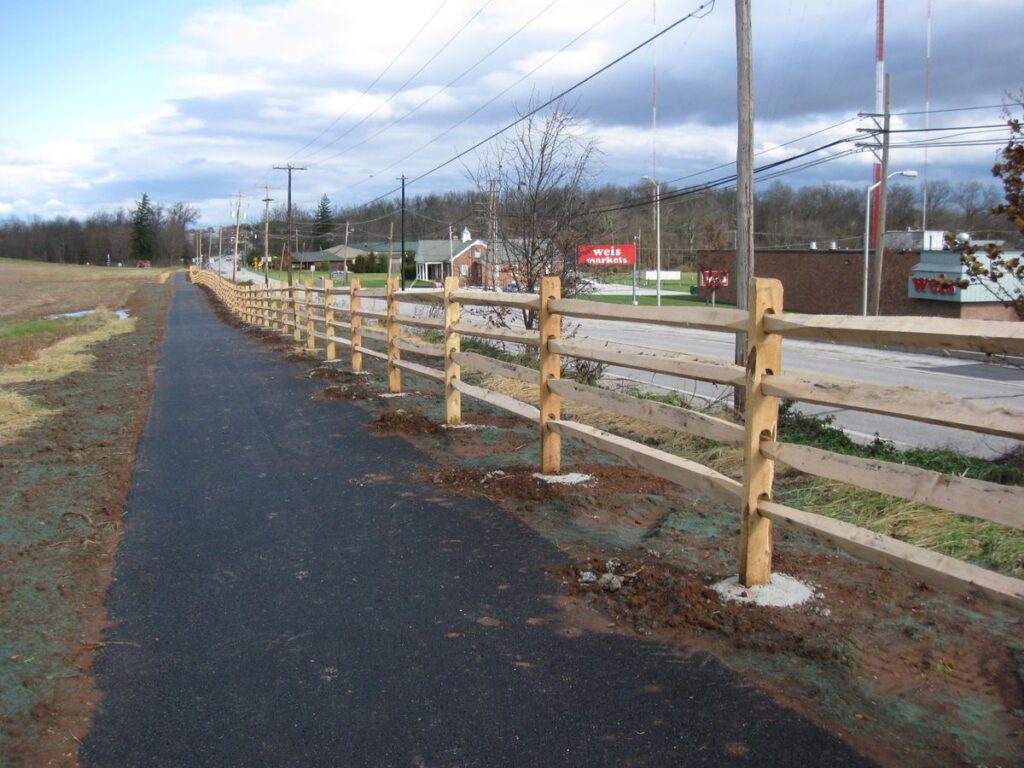
- The general rule for fence post depth is to bury at least one-third of the post’s length in the ground, with standard spacing being 6 to 8 feet apart for wood fences.
- Using gravel at the base of post holes can prevent water accumulation, and setting posts in concrete enhances stability and longevity, particularly for wooden and metal posts.
- For fences higher than 1.8 meters, posts should be set about 1 meter into the ground to ensure straight and stable fence lines, even on uneven terrain.
- The maximum distance between fence posts varies by fence type; while wood, composite, or vinyl fences typically have 8 feet spacing, chain link fences can have up to 10 feet.
- When cutting your rails or dealing with different materials, consider the specific requirements for post depth and spacing to maintain fence integrity and appearance.
Determining Optimal Fence Post Depth

General Guidelines for Post-Depth
When constructing a fence, the depth at which you set your fence posts is a critical factor for ensuring stability and longevity. As a general guideline, it is recommended to dig a hole depth that is 1/3 to 1/2 the height of the above-ground portion of the post for a wooden fence. This ensures that the post is anchored sufficiently to withstand environmental stresses such as wind and soil movement.
For fences higher than 1.8 meters, aim to set your post about 1 meter into the ground. However, the exact depth may vary based on the type of soil and the design of the fence. Here’s a quick reference for common post heights and their recommended depths:
| Post Height (meters) | Depth (meters) |
|---|---|
| 1.2 | 0.4 – 0.6 |
| 1.8 | 0.6 – 0.9 |
| 2.4 | 0.8 – 1.2 |
It’s essential to maintain consistent post depth throughout the fence line to ensure a straight and uniform appearance. Corner and end posts should be set deeper to provide additional stability, especially in areas where the fence will support gates or heavy loads.
Remember to check local building codes and regulations as they may dictate specific requirements for post depth and spacing.
Factors Influencing Depth Requirements
When determining the optimal depth for fence posts, several factors must be considered to ensure stability and longevity. Soil type plays a crucial role; sandy or loamy soils may require deeper post holes compared to clay or rocky soils, which offer more resistance and can hold posts more securely.
The climate is another significant factor; in areas with frequent freeze-thaw cycles, posts should be set below the frost line to prevent heaving. Additionally, the type of fence and its purpose influence depth requirements. For example, privacy fences or those designed to contain large animals need deeper posts for adequate support.
- Soil Type: Sandy, Loamy, Clay, Rocky
- Climate: Freeze-thaw cycles
- Fence Type: Privacy, Containment, Decorative
- Purpose: Security, Privacy, Aesthetics
The depth of a fence post is critical for the overall stability of the fence. Gate posts, in particular, require more stability due to the weight and movement of the gate.
Lastly, the height of the fence and the size of the posts themselves must be factored in. Taller fences and larger posts will need to be set deeper to counteract the increased leverage from wind and gravity.
Adjusting Depth for Different Fence Heights
When constructing a fence, the depth at which posts are set is crucial for ensuring stability and longevity. The general rule of thumb is to bury at least one-third of the post’s length in the ground. However, this rule must be adjusted for different fence heights to maintain proper balance and support.
For fences up to 1.8 meters high, posts are typically set 2 meters to 2.7 meters apart and should be buried to a depth that accommodates the height and weight of the fence. Here’s a quick reference table for common fence heights and their recommended post depths:
| Fence Height (m) | Recommended Post Depth (m) |
|---|---|
| 1.2 | 0.6 |
| 1.5 | 0.75 |
| 1.8 | 0.9 |
Remember, deeper post settings may be required for areas with high wind exposure or loose soil conditions to ensure a stable and secure fence structure.
It’s also important to consider the gap at the top of the fence. For instance, a 6-inch gravel board can be used to eliminate gaps between the panel and the top of the post, providing a seamless appearance.
Spacing Fence Posts for Stability and Aesthetics
Standard Spacing Measurements
When planning your fence, proper post spacing is essential for both stability and aesthetics. For most residential wood fences, the standard spacing is eight feet, aligning with the common panel width. However, spacing can vary depending on the type of fence and the materials used.
For chain link fences, which are inherently stronger, posts can be spaced up to 10 feet apart. In contrast, posts for wire boundaries or cattle fences can be spaced as far apart as 25 feet, accommodating larger areas without sacrificing strength.
It’s important to balance the distance between posts to prevent sagging rails and to avoid a cluttered look. Too much spacing can lead to a weak fence, while too little can result in unnecessary work and expense.
Here’s a quick reference for standard post spacings:
| Fence Type | Standard Post Spacing |
|---|---|
| Wood | 8 feet |
| Chain Link | 10 feet |
| Wire | 25 feet |
Remember, if you’re working with prefabricated panels, precision is key, and the post spacing must match the panel width exactly. Customizing your rails offers more flexibility, allowing you to choose a spacing that suits your specific needs and terrain.
The Impact of Post Spacing on Fence Durability
Proper post spacing is a cornerstone of fence durability. Setting posts too far apart can lead to sagging rails and a fence that is easily compromised by wind. Conversely, spacing them too closely can result in unnecessary costs and a visually unappealing fence line.
The optimal spacing for fence posts ensures both stability and aesthetic appeal. It varies depending on the type of fence and the materials used.
For wooden fences, the standard post spacing is typically eight feet, which balances the weight of the panels and maintains privacy. Chain link fences can have wider spacing due to their inherent strength, allowing for post intervals of up to ten feet. When dealing with wire fences for boundaries or livestock, posts can be spaced as far as 25 feet apart.
Terrain also plays a significant role in determining post spacing. On sloped ground, posts may need to be placed closer together to prevent gaps under the fence that could allow animals to pass through. Custom-cut rails offer more flexibility in spacing, but it’s important to adhere to recommended distances for the specific fence type being installed.
How to Measure and Mark Post Placement
Measuring and marking post placement is a critical step in ensuring your fence is straight, evenly spaced, and aesthetically pleasing. Begin by driving a stake at one end of your intended fence line, and attach a string line to run along the boundary to the opposite end post. This string will serve as your guide for alignment.
- Drive a stake at one end post position.
- Run a string line along the boundary to the opposite end post.
- Measure and stake intermediate posts at equal distances.
For standard fences up to 1.8m high, posts are typically spaced between 2m to 2.7m apart. However, for fences higher than 1.8m, consider setting your posts about 1m into the ground for added stability. Use an auger-type post-hole digger to make the job easier.
Ensure that each post is set flush with the string line for a straight fence. Dig the holes and set each post in a mixture of soil and dry cement, as done for the corner posts.
Remember to set both corner posts first to ensure all posts will be in a straight line. The use of a timber sole plate or a 50mm layer of concrete at the bottom of each hole can provide a stable base for the posts. Temporary bracing may be necessary to keep the posts upright and straight, especially in sandy soil conditions.
Using Gravel and Concrete for Secure Installation

Benefits of Gravel at the Base of Posts
Incorporating gravel at the base of fence posts is a practice that serves multiple purposes. Gravel facilitates proper drainage, preventing water from pooling around the posts. This is crucial as standing water can lead to premature rot in wooden posts and corrosion in metal ones. Additionally, gravel can improve the overall stability of the fence, ensuring that each post remains securely anchored over time.
- Proper Drainage: Gravel allows water to drain away from the post, reducing the risk of deterioration.
- Stability: It provides a solid bed that helps to keep the post upright and stable.
- Longevity: By preventing water accumulation, gravel extends the life of the post.
When considering the installation of fence posts, the use of gravel should not be overlooked. It is a simple yet effective way to enhance the durability and longevity of your fence.
Regular maintenance, such as checking the stability of posts and controlling vegetation around the base, is also essential for a long-lasting fence structure. Using gravel is particularly beneficial for wooden and metal posts, which are more susceptible to the effects of moisture.
Step-by-Step Guide to Setting Posts in Concrete
When setting fence posts in concrete, it’s essential to start with a solid foundation. Place a timber sole plate or a 50mm layer of concrete at the bottom of each hole to support the post. This ensures that the post remains upright and stable during the installation process.
- Set one corner post in concrete, typically the one on the highest ground, and allow the concrete to set.
- Attach the first panel to the corner post and the first line post, which helps level the line post parallel to the fence.
- Ensure the post is also leveled perpendicular to the fence before the concrete fully sets.
For posts set in sandy soil, consider using special post struts to maintain stability. Always brace the post temporarily to keep it straight and upright. After placing the posts in the holes, fill them with concrete, making sure they are level and aligned. Allow sufficient time for the concrete to cure before attaching any panels or wires.
It is crucial to use concrete to secure the posts, especially for wooden and metal posts. Adjust your installation techniques to accommodate the terrain, as sloped lands may require different post heights and methods to ensure a level fence.
Long-Term Advantages of Concrete Anchoring
Concrete anchoring provides unparalleled longevity and stability for fence posts, ensuring the fence’s integrity over time. The robust nature of concrete resists environmental decay and stands firm against extreme weather conditions, making it a superior choice for load-bearing posts.
- Weather Resistance: Capable of withstanding extreme conditions without warping or rotting.
- Pest Resilience: Immune to termites and other pest infestations.
- Minimal Upkeep: Requires only occasional checks for stability and integrity.
Concrete fence posts represent the pinnacle of durability and strength, capable of enduring the most challenging environmental conditions.
While the initial cost and installation effort may be higher for concrete posts, their maintenance-free nature and resistance to pests and weather make them a sound investment for long-term fencing solutions. The weight and rigidity of concrete also mean that once set, the posts are unlikely to shift, providing a steadfast foundation for any fence.
Navigating Terrain Challenges in Fence Construction

Adjusting Post Spacing on Uneven Ground
When constructing a fence on uneven terrain, adjusting the spacing between posts is crucial for maintaining both aesthetics and stability. On sloped ground, the ‘step’ method often requires posts to be placed closer together to prevent large gaps beneath the fence, which could allow animals to pass through.
- For a visually pleasing and secure fence, consider the following:
- Use the racking method for slight slopes, allowing the rails to follow the contour.
- For steeper inclines, the step method with closer post spacing is recommended.
- Ensure corner posts are set first to establish a straight line.
It’s essential to balance the visual continuity of the fence with the practical need to prevent gaps. This often means deviating from the standard eight-foot spacing on level ground.
Remember, gate posts should be set deeper and slightly wider apart to accommodate the weight and movement of the gate, preventing sagging.
Dealing with Slopes and Elevation Changes
Building a fence on sloped terrain requires careful planning to ensure stability and aesthetic appeal. When dealing with slopes, it’s crucial to adjust the post spacing and installation techniques to maintain a level fence line. For the step method, where the ground slopes away from the bottom rail, posts may need to be set closer together to prevent gaps that could allow animals to pass through.
To ensure a secure installation on a slope, always measure a hole three times your post’s diameter and as deep as at least a third of the post’s height.
Using concrete to secure posts is highly recommended, particularly for wooden and metal posts, as it provides additional stability on uneven ground. Moreover, proper drainage around the base of the posts is essential to prevent water pooling, which can lead to accelerated deterioration of the material.
Techniques for Ensuring Straight Fence Lines
Ensuring your fence posts are in a straight line is crucial for both aesthetics and structural integrity. Set both corner posts first as they will act as guides for the rest of the fence. Use a string line stretched between these corner posts to maintain alignment as you work.
For a precise guide, consider using a laser level or a long, straight board. This will help you verify that each post is in line with the others. When setting the posts, it’s important to check that they are not only aligned but also level. A post level can be attached to each post to ensure accuracy in both the vertical and horizontal planes.
When installing the fence panels, they can assist in leveling the line posts parallel to the fence line. This is particularly useful when working on uneven terrain where maintaining a straight line can be challenging.
Remember to stagger the rail joints on different posts to increase the fence’s overall strength. For fences higher than 1.8m, deeper post settings are recommended to provide additional stability.
Selecting the Right Fence Post Material

Comparison of Wood, Metal, and Composite Posts
When choosing the right material for fence posts, homeowners and contractors must weigh the pros and cons of each type. Wooden fence posts offer a classic, natural look and are generally easier to install due to their lighter weight. However, they require regular maintenance to prevent decay and damage from pests.
Metal posts, including steel and aluminum options, provide superior strength and durability. Steel posts are often galvanized to resist rust, making them suitable for heavy-duty fencing needs. Aluminum posts, while not as strong as steel, offer excellent corrosion resistance and are ideal for coastal environments.
Composite fence posts, a blend of recycled plastic and wood fibers, present a modern alternative. They boast the aesthetic appeal of wood with the added benefit of low maintenance, similar to vinyl fences but with a different composition.
Choosing the right material for your fence posts is crucial for the longevity and stability of your fence. Consider the specific needs of your property, such as climate, soil conditions, and the desired level of maintenance.
Here’s a quick comparison of the three materials:
- Wooden Posts: Aesthetic appeal, lighter weight, requires maintenance.
- Metal Posts: High strength, rust-resistant options, sleek appearance.
- Composite Posts: Low maintenance, environmentally friendly, durable.
Considerations for Cutting Your Rails
When opting to cut your fence rails, precision is key to ensure a professional look and proper fit. Measure twice and cut once to avoid material waste and ensure that the rails align correctly with the posts. The notches for the rails should be chiseled out carefully to match the depth of the rails for a flush fit.
It’s important to stagger the joints where rails meet on a post and to ensure that the bottom rail is no more than 175mm from the plinth for structural integrity.
For a more refined finish, consider capping your fence. This not only extends the life of the palings but also enhances the fence’s appearance. Ensure that the top rails are flush with the post tops, and the palings are flush with the top rail. Use galvanized nails for durability, spacing them appropriately:
- 75mm nails every 600mm for cappings
- 40 x 2mm nails for under palings
- 50 x 2.8mm nails for over palings
Lastly, remember to cut the tops of the palings and posts at an angle to allow water runoff, which helps prevent rot and extends the life of your fence.
Maintenance and Longevity of Different Materials
The maintenance and longevity of fence posts are pivotal factors in the overall health and aesthetic of your fence. Choosing the right material is the first step towards ensuring a long-lasting fence. Each material, from the natural charm of wood to the strength of metal and the practicality of composite, has its own maintenance needs and longevity profile.
- Wood requires regular treatment to resist weather and pests.
- Metal, while more durable, may need inspections for rust or corrosion.
- Composite materials offer a balance of durability and minimal maintenance.
Proper installation and regular care are essential for prolonging the life of your fence. Ensuring posts are set at the correct depth and spaced appropriately guarantees stability and durability, regardless of material choice. A well-maintained fence not only enhances property aesthetics but also contributes to sustainability by reducing the need for frequent replacements.
The ultimate goal is to strike a balance between aesthetic appeal, functionality, and maintenance requirements to achieve a fence that stands the test of time.
Conclusion
In summary, the depth and spacing of fence posts are pivotal for a stable and enduring fence. Adhering to the general guideline of burying at least one-third of the post’s length into the ground and maintaining a spacing of 6 to 8 feet, depending on the fence type, will ensure structural integrity.
The use of gravel and concrete is highly recommended to prevent water damage and provide additional stability.
Whether you’re installing a wooden, metal, or chain-link fence, understanding the specific requirements for post depth and spacing is essential for a successful installation.
Frequently Asked Questions Fence Post Depth Calculator
What is the general rule for fence post depth?
The general rule for fence post depth is to bury at least one-third of the post’s length in the ground, ensuring stability.
How far apart should fence posts be spaced?
For most wood fences, the standard spacing between fence posts is eight feet, although this may vary depending on the type of fence and terrain.
Why is it recommended to use gravel and concrete when setting fence posts?
Gravel is used at the bottom of the post hole to prevent water accumulation, while concrete secures the posts in place, providing stability and longevity.
How does terrain affect fence post spacing?
Uneven ground, slopes, and elevation changes may require adjusting post spacing to ensure a straight and stable fence line.
What is the maximum distance between fence posts for a solid fence?
For solid fences made from wood, composite, or vinyl, the maximum standard distance between posts is eight feet to maintain strength in windy conditions.
Can you cut your rails for a fence, and how does it affect post spacing?
You can cut your rails from materials like 2×4 lumber, which provides flexibility in post spacing. Wood fence standard spacing is eight feet, while chain link and wire fences can have greater spacing.